Lyceum B - Astronomy - Week 18 - The Sun
- Apr 5, 2022
- 9 min read
Updated: Apr 6, 2022
Sun Spots:
Sunspots look like dark splotches on the sun’s surface because the sun’s magnetic field is not uniform across its surface.
The number of sunspots increases to a maximum level every 11 years and then fades away. We call this the “solar cycle”.
There are regions of reduced surface temperature caused by concentrations of magnetic field flux that inhibit convection. Sunspots appear in pairs of opposite magnetic polarity. Their number varies according to the approximately 11-year solar cycle. - wiki
From How the Universe Works:
Where the magnetic field comes through the Sun’s hot surface, it prevents heat from rising. The result is a cooler spot, which looks darker than the rest of the surface. Over the years the field gets “wound up” like a twisted rubber band-possibly because the poles and equator of the Sun spin at different rates. The winding up makes the field stronger, and more sunspots appear. The whole Sun becomes much more active at “sunspot maximum”, with effects that can be felt way beyond the Sun-even on Earth.
Prominences
Above the sunspots, loops of the magnetic field protrude into the Sun’s lower atmosphere, the chromosphere. Here, magnetism traps gas and controls the Sun’s “weather”. It also supports huge loops of glowing gas, called prominences. The biggest prominences are 100 times bigger than Earth - How the Universe Works

From nasa.gov
A solar prominence (also known as a filament when viewed against the solar disk) is a large, bright feature extending outward from the Sun’s surface. Prominences are anchored to the Sun’s surface in the photosphere, and extend outwards into the Sun’s hot outer atmosphere, called the corona. A prominence forms over timescales of about a day, and stable prominences may persist in the corona for several months, looping hundreds of thousands of miles into spaces. Scientists are still researching how and why prominences are formed.
The red-glowing looped material is called plasma, a hot gas comprised of electrically charged hydrogen and helium. The prominence plasma flows along a tangled and twisted structure of magnetic fields generated by the sun’s internal dynamo. An erupting prominence occurs when such a structure becomes unstable and bursts outward, releasing the plasma.
Solar Flares
The magnetic field that causes sunspots can be imagined as two poles of a magnet thrusting up through the Sun’s surface. In the Sun’s atmosphere, the magnetism can support a glowing arch of hot gas from one spot to another - a prominence.
When two magnetic loops touch, they can short-circuit one another. The resulting explosion - a solar flare - can be as powerful as millions of nuclear explosions - How the Universe Works
SDO Spots X8.2-Class Solar Flare, Sept. 10, 2017 - Nasa Goddard - 5:12 min
A Guide to Solar Flares - Nasa Goddard - 3:12 min
From nasa.gov:
Harmful radiation from a flare cannot pass through Earth’s atmosphere to physically affect humans on the ground, however-when intense enough-they can disturb the atmosphere in the layer where GPS and communication signals travel.
————————————-
As a reminder, never look directly at the sun, that includes when using binoculars or a telescope. It will damage your eyes or make you go blind if the damage is severe.
Sunspot Projector
The sun also rotates on its axis, so that the sunspots we see rotate as well. Most sunspots last for days, long enough to see the same sunspots come back around to the side of the sun facing earth.
Because there Sun does not rotate as a solid body, spots near the equator appear to move around more quickly than spots near the poles. - How the Universe Works
Here is how to make a sunspot projector - need to be where you can ben in direct sunlight. Reminder - never look at the Sun.
You will need a pair of binoculars, 2 white poster boards and tracing paper
Prop up one poster board (this poster board will serve as our screen) so it faces the Sun. Tape a sheet of tracing paper in the center.
Cut a hole in the center of a second poster board that is just large enough to fit one of the large end of the binocular lens (not the part you put up to your eye). Firmly tape the binoculars to the poster board with the hole over one lens of the binoculars. If you can prop the binoculars against a chair seat, it will be steadier than trying to hold the whole thing up by hand. You will want to be about 1 yard in front of the poster screen so that the shadow of the the binoculars falls on the tracing paper taped to the poster board screen.
Slowly tilt and turn the binoculars until a patch of sunlight coming through the binoculars falls on the tracing sheet.
Focus the binoculars until the image of the sun is sharp.
Have another person draw a circle around the edge of the Sun and mark where the sunspots (dark areas) show up. In a few minutes, you will see the sun move sideways as the Sun rotates. Outside the circle, draw an arrow indicating the Sun’s direction of rotation.
On the next sunny day, repeat this experiment with a new sheet of tracing paper taped up the same way.
Compare the two drawings of the sun and its sunspots. You will notice that the sunspots have moved as the sun rotates.
To see how big those sunspots are, measure the diameter of the sun you have drawn on your tracing paper. Divide the diameter by 100 and then draw an earth next to your sun that has this new measurement. This is the size of the earth to the same scale. Compare the sizeof the earth to some of the sunspots you have marked down. Which is bigger - the sunspots or earth?
————————————————————-
Sunspot Cycle
The first few spots of a new solar cycle break out at high latitudes, near the poles of the Sun. Over the next few years, sun spots appear closer and closer to the Sun’s equator and increase in number. After reaching a peak, the sunspots start to diminish in number, but the ones that do occur, happen ever closer to the equator. As the last sunspots near the equator fade away, we start to see the first sunspots popping up near the poles and again and a new solar cycle begins.
For this project, you will need black poster board and yellow poster board.
Cut out a 12 x 6 inch piece of black poster board. Fold it 1 inch from one end and then cut out a 5 inch diameter circle next to the fold. Glue a square of yellow poster board over the cut out circle.
Hold the black poster board up, so you can see the “Sun” on the front of the standing card.
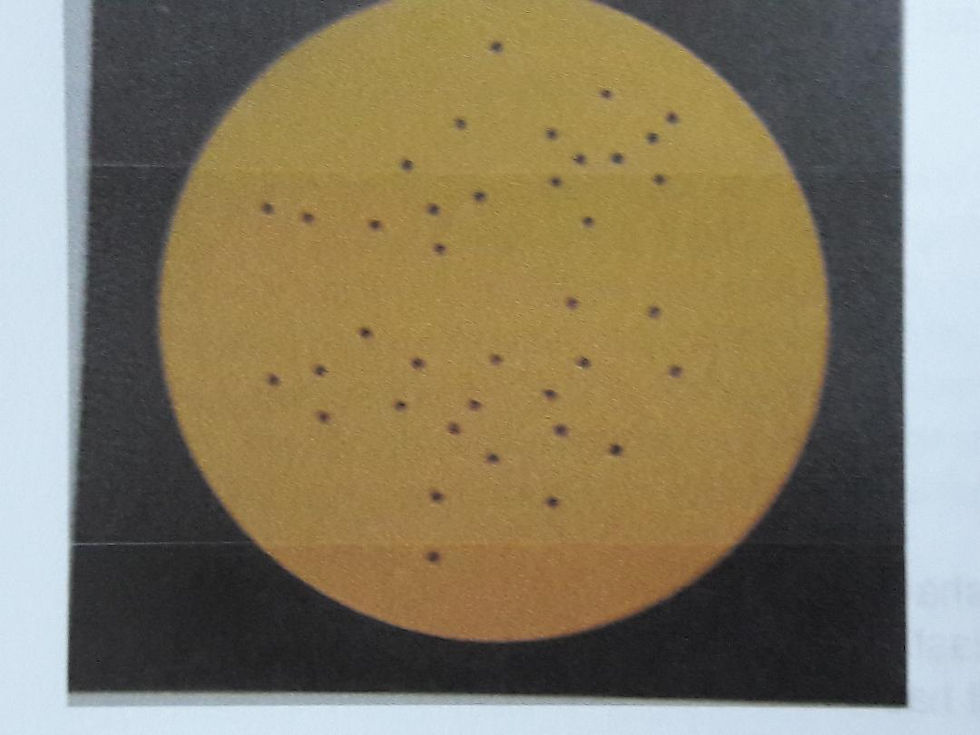
With you pencil point, make holes in the yellow “Sun” in the pattern below.
Cut a strip of yellow poster board 20 x 6 inches with a tab on the end for pulling. Draw > patterns pointing toward an end and color the “>”s black.
Fit the yellow strip onto the 1 inch fold along the back of the black poster board. This will act as a guide for your yellow strip.
Now as you slowly pull the yellow strip along the back of the “Sun” you will see the sunspots appear near the “poles” and then move toward the “equator”, reaching a maximum on the way.
————————————————
How We See a Small Object Block Out a Bigger Object:
Using a tree (or other object) that is far away, hold up one finger to block your view of the tree. Closing one eye makes it easier to see a total blockage.
You can also do this with a ceiling light by holding up a coin in front of one eye while covering the other eye with your hand. Because the coin is close to your eye it can block out the ceiling light which is further away.
———————————————————
Illustrating the Umbra and Penumbra of a Solar Eclipse
You can use any small sphere, like an orange or even an apple, to do this demonstration.

——————————————————-
Making a Solar Eclipse:
You will need 2 wooden skewers, a lamp without a shade that uses a 40 watt bulb, thin, while poster board, plastic putty to hold up skewer with modeling clay ball (so it has to be fairly firm, not soft putty or clay).
You will need to do this experiment at a table or somewhere that you can get behind the poster board to look through at the solar eclipse.
Make a ball of modeling clay with a 1 inch diameter to represent the moon. Stick it on top of a skewer and push the other end into the plastic putty to hold the “Moon” upright on the skewer.
Place the lamp as the “Sun” and the “Moon” so they are at the same height, by using books or what have you, to elevate one or the other. Turn the lamp off and place the poster board at the position that your eye would need to be to see the “Moon” cover the sphere of the lightbulb “Sun”. Do this visualizing with your eye before you place the poster board in position.
When all is in the correct position, turn the lamp “Sun” on. The “Moon” should cast a shadow on the screen, which is in the “Earth” position, where you will be standing.
With a marker, place an x on the poster board at the shadow of the “Moon” and two x where the edge of that “Moon” shadow is on the poster board.
You can now briefly look through each of these holes from behind the poster board and view the “eclipse”.
Solar Eclipse
Because the Sun is further away from the Earth than the Moon, if the Moon passes between the Sun and Earth, it can block our view of the Sun. The Sun is 400 times bigger than the Moon, but it is also 400 times farther away from the Earth. As a result, from Earth, they both look about the same size. The Moon’s disk just overlaps the Sun’s disk.
When the moon passes in front of the sun between the Earth and the Sun, it blocks out the view of the sun from earth creating a solar eclipse.
During a total eclipse, the Moon casts a deep shadow (the umbra) on the surface of the Earth, and anyone in the shadow - which is less than 155 miles wide, will see the Sun blotted out. Because the Earth is turning, the umbra rushes across the Earth’s surface, tracing out an “eclipse track”. The Earth’s spin therefore brings the sight of the eclipse to anyone situated in a long narrow band on the Earth’s surface.


An eclipse of the Sun, even a partial one, is rare for a person to witness.
A total solar eclipse will happen in April 2024. It will be visible in Mexico, the U.S. and Canada.

https://www.space.com/15584-solar-eclipses.html - difference between total, partial and annual solar eclipse - also has several good video explainers
How to Safely Watch an Eclipse (from space.com)
Its the sun that is dangerous - all the time!
The sun constantly emits invisible infrared rays that can damage your eyes. Ordinarily, we have no reason to gaze at the sun. An eclipse gives us a reason, but we shouldn’t.
There are safe ways, however…..
By far, the safest way to view a solar eclipse is to construct a “pinhole camera”. A pinhole or small opening is used to form an image of the sun on a screen placed about 3 feet (or about 1 meter) behind the opening.
Binoculars or a small telescope mounted on a tripod can also be used to project a magnified image of the sun onto a white card. The farther away the card, the larger you can focus the image. Look for sunspots. Notice that the sun appears somewhat darker around its limb or edge. This method of solar viewing is safe as long as you remember not to look through the binoculars or telescope when they are pointed toward the sun; put another way, never look directly at the sun when any part of its blindingly bright surface is visible.
A variation one the pinhole theme is the “pinhole mirror”. Cover a pocket-mirror with a piece of paper that has a 1/4-inch hole punched in it. Open a sun-facing window and place the covered mirror on the sunlit sill so that it reflects a disk of light onto the far wall inside. The disk of light is an image of the sun’s face. The farther away from the wall is the better; the image will only be about 1 inch across for every 9 feet (or 3 centimeters for every 3 meters) from the mirror. Modeling clay works well to hold the mirror in place. Experiment with different-sized holes in the paper. Again, a large hold makes a bright image, but fuzzy, and a small one makes it dim but sharp. Darken the room as much as possible. Be sure to try this out beforehand to make sure the mirror’s optical quality is good enough to project a clean, round image. Of course, don’t let anyone look at the sun in the mirror.
Unacceptable filters include sunglasses, old color film negatives, black-and-white film that contains no silver, photographic neutral-density filters and polarizing filters.
Although these materials have very low visible-light transmittance levels, they transmit an unacceptably high level of near-infrared radiation that can cause a thermal retinal burn. The fact that the sun appears dim, or that you feel no discomfort when looking at the sun through these types of filters, is no guarantee that your eyes are safe.
There is one time when you can safely look directly at the sun: during a total eclipse, when the sun’s disk is entirely covered. During those few precious seconds or minutes, the magnificent corona shines forth in all its glory surrounding the darkened sun; a marvelous fringe of pearly white light. It differs in size, in tints and patterns from eclipse to eclipse. It is always faint and delicate, with a sheen like a pale aurora. It has a variable appearance. Sometimes it has a soft continuous look; at other times, long rays of it shoot out in three or four directions. It may stand out from the disk in filmy petals and streamers. But when the sun begins to again emerge into view, the corona quickly disappears and you’ll need to protect your eyes once again.
---------------------------------------------
Videos:
Professor Dave Explains - - 6:42 min
The Formation of the Milky Way Galaxy
Tides: Crash Course Astronomy #8 - 9:46 min


Comments